Foundation Repair Method Selector
Select your symptoms to find the best DIY repair method for your foundation issue.
Did you know that over 30% of single‑family homes develop some kind of foundation issue within the first 20 years? When the ground shifts, cracks spider across the walls, or floors start to slope, it feels like an emergency. But you don’t always have to call a contractor right away. With a clear plan, the right tools, and a bit of patience, many homeowners can handle common problems themselves.
Quick Summary
- Identify the type of foundation damage before you start.
- Choose the appropriate DIY method: pier & beam, slab jacking, or epoxy injection.
- Gather essential tools - hydraulic jack, laser level, epoxy resin, and more.
- Follow step‑by‑step instructions for safe, effective repairs.
- Implement preventive measures to keep the foundation stable long‑term.
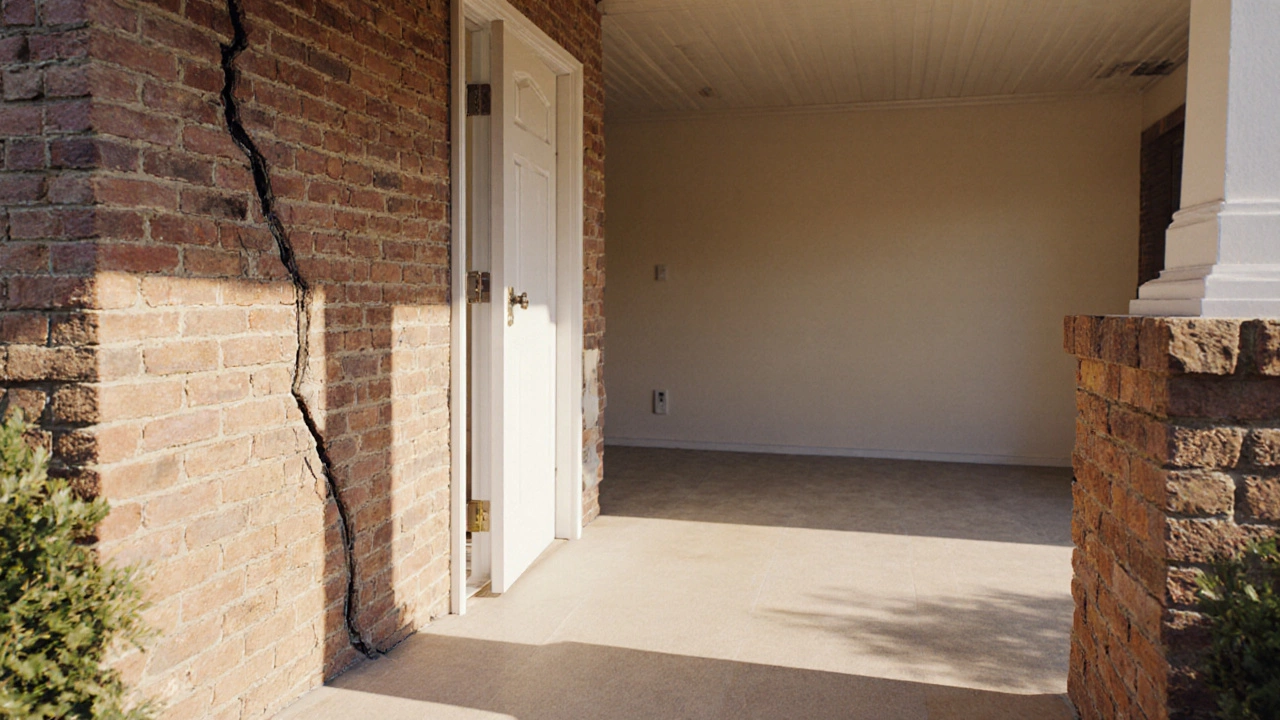
Spotting Foundation Problems
Before you grab a tool, you need to know what you’re dealing with. Common signs include:
- Vertical cracks wider than ¼ inch in walls or masonry.
- Doors and windows that stick or won’t close properly.
- Uneven floors that roll like a small ramp.
- Gaps between the ceiling and the walls.
These clues usually point to one of three culprits: soil the earth surrounding the foundation, which can expand, contract, or shift movement, excess moisture water that infiltrates the ground, raising pressure against the foundation, or inadequate structural support.
Choosing the Right DIY Method
Not every crack calls for the same fix. Below is a quick comparison of the three most common DIY approaches.
| Method | Best For | Typical Cost (NZD) | Tools Needed | Skill Level |
|---|---|---|---|---|
| Pier & Beam | Significant settlement, large gaps under the floor | 1,200 - 3,000 | Hydraulic jack, steel pier, drill, concrete mix | Intermediate |
| Slab Jacking (Mudjacking) | Sloping concrete slabs, minor settlement | 800 - 2,000 | Hydraulic jack, slurry pump, mix of sand, cement, and water, laser level | Beginner‑Intermediate |
| Epoxy Injection | Hairline to medium cracks in walls or footings | 300 - 900 | Epoxy resin, injection ports, mixing sticks, crack filler | Beginner |
Essential Tools & Materials
Gather everything before you start - rushing in half‑equipped can cause more damage.
- Hydraulic jack a device that lifts heavy loads with fluid pressure - core for both pier installation and slab jacking.
- Laser level an instrument that projects a constant reference line for precise leveling - keeps the floor even.
- Concrete mix pre‑blended cement, sand, and aggregate for casting piers or filling voids.
- Epoxy resin a two‑part adhesive that hardens into a strong, waterproof bond.
- Crack filler flexible material designed to seal small gaps before epoxy injection.
- Moisture barrier plastic sheet or spray coating that stops water from reaching the foundation - essential for long‑term protection.
- Safety gear: gloves, goggles, steel‑toe boots.
Step‑by‑Step DIY Repairs
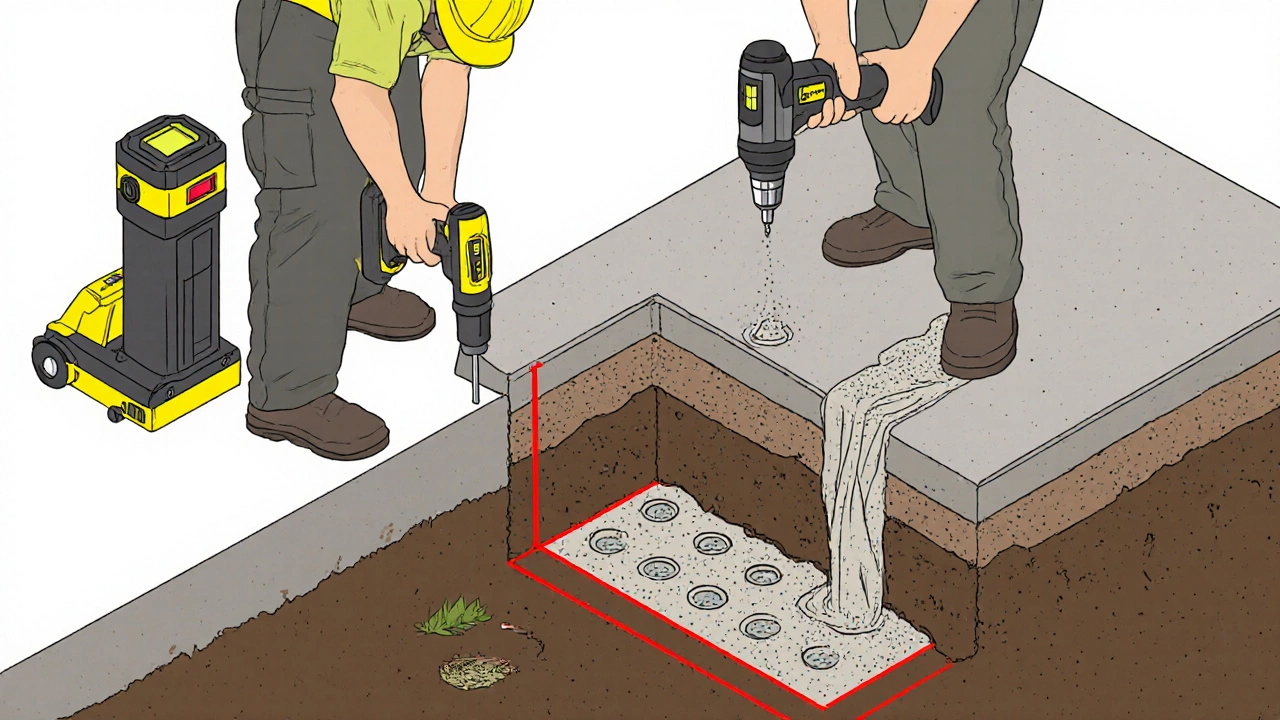
1. Slab Jacking (Mudjacking) - Raising a Sinking Concrete Floor
- Clear the area and locate the low spots using a laser level. Mark the exact points where the floor is lowest.
- Drill a series of 2‑inch holes (about 6‑8 per low spot) spaced roughly 12 inches apart. Depth should be about 12 inches, reaching the soil underneath.
- Mix the slurry: combine 1 part cement, 2 parts sand, and enough water to achieve a thick, pourable consistency.
- Using a slurry pump, pump the mixture into each hole. The pressure will force the soil to compact and lift the slab.
- Continuously check elevation with the laser level. Stop pumping once the floor matches the surrounding surface.
- Allow the slab to cure for at least 24 hours before walking on it.
- Seal the holes with a quick‑setting concrete mix and apply a moisture barrier coat to protect against future water intrusion.
2. Epoxy Injection - Healing Cracks in Walls or Footings
- Clean the crack thoroughly. Use a wire brush and a vacuum to remove dust, debris, and loose particles.
- Apply a thin layer of crack filler to seal the surface and prevent epoxy from leaking out.
- Insert injection ports (small plastic tubes) at 6‑inch intervals along the crack.
- Mix the epoxy resin according to manufacturer instructions - usually a 1:1 ratio.
- Using a low‑pressure syringe, inject the epoxy into the lowest port first. Watch the epoxy fill the crack and push out any air bubbles.
- After the epoxy reaches the next port, seal that port and move upward, repeating until the entire crack is filled.
- Allow the epoxy to cure (typically 30‑60 minutes). Remove the ports and sand any excess for a smooth finish.
- Apply a coat of waterproofing paint or a moisture barrier to guard against future moisture.
3. Pier & Beam Installation - Supporting Major Settlement
- Locate the load‑bearing walls using the house’s original plans or by consulting a structural engineer for critical points.
- Excavate a narrow trench beneath each load point, reaching stable, compacted soil.
- Place a steel pier (often a 6‑inch pipe filled with concrete) at the bottom of the trench.
- Use the hydraulic jack to slowly raise the house until the floor is level, monitoring with a laser level for accuracy.
- While holding the structure in place, fill the trench around the pier with fresh concrete mix to lock the pier in position.
- Lower the jack carefully, then backfill the surrounding soil and compact it in layers.
- Finish by installing a moisture barrier and re‑securing any flooring or baseboards.
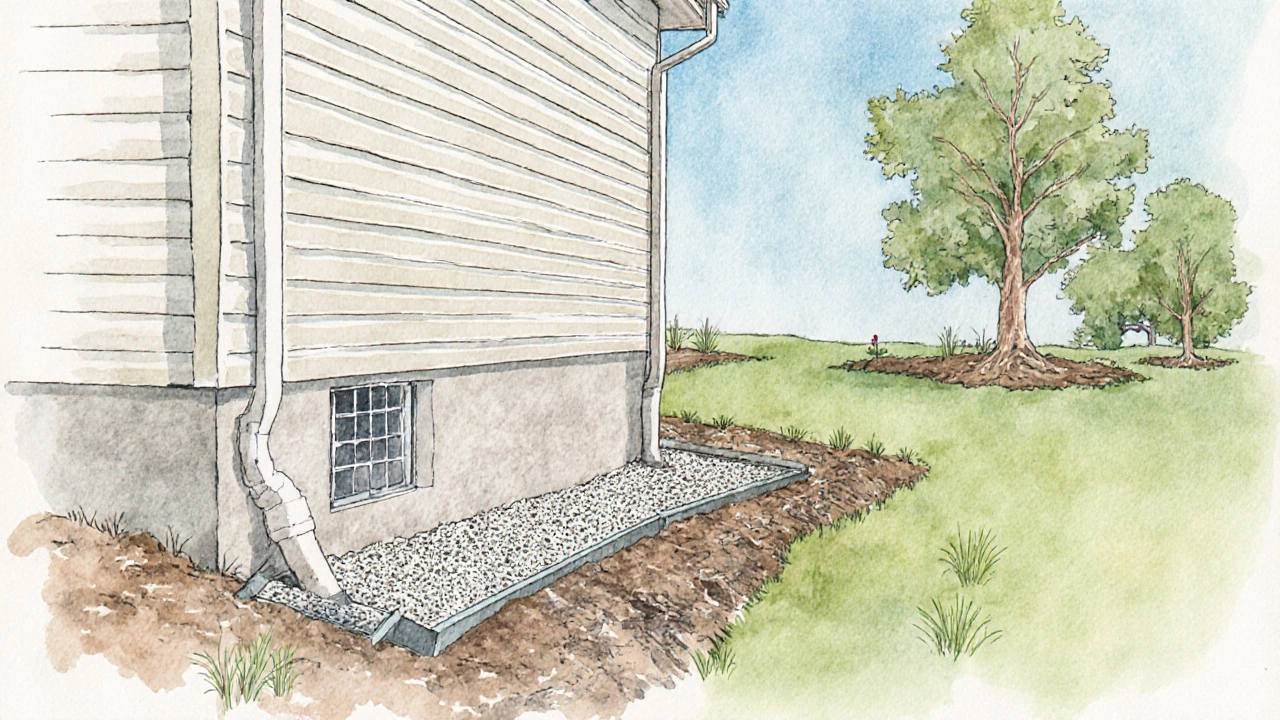
Preventive Measures to Keep Your Foundation Healthy
Repair works best when you stop the problem from returning. Consider these upgrades:
- Proper Drainage: Ensure gutters direct water at least 6 feet away from the house and install French drains where soil retains water.
- Soil Stabilization: Add a layer of compacted gravel or crushed stone beneath landscaping beds to reduce soil movement.
- Waterproofing: Apply a high‑quality sealant coating on exterior walls and install a continuous moisture barrier beneath basement floors.
- Tree Management: Avoid planting large trees too close to the foundation; roots can extract moisture and cause soil shrinkage.
When to Call a Professional
DIY can handle many issues, but some situations call for a specialist:
- Cracks wider than ½ inch that span multiple bricks or stones.
- Rapid, ongoing settlement despite repeated DIY attempts.
- Visible movement in load‑bearing beams or sagging ceilings.
- Complex soil conditions, such as expansive clay, that need engineered solutions.
If you’re unsure, getting a structural engineer’s assessment can save money and headaches down the line.
Frequently Asked Questions
How much does DIY foundation repair typically cost in New Zealand?
For a modest slab‑jacking project you’re looking at NZD800‑2,000, while epoxy injection for wall cracks runs about NZD300‑900. Pier installation is the priciest DIY route, often NZD1,200‑3,000 depending on depth and material costs.
Can I use regular concrete for pier footings?
Yes, a standard 30‑MPa concrete mix works well. Ensure the mix includes a proper water‑cement ratio and add reinforcement mesh for extra strength.
What safety gear is essential for foundation repair?
Wear heavy‑duty gloves, safety goggles, steel‑toe boots, and a dust mask. When using a hydraulic jack, keep a stable base and never exceed the jack’s rated capacity.
How long does epoxy need to cure before I can repaint the wall?
Most epoxy systems reach full strength within 24hours, but to ensure optimal adhesion of paint, wait 48hours after the final cure.
Is slab jacking safe for homes with a basement?
Yes, as long as you drill holes beneath the slab and keep the pressure below the manufacturer's limit. Monitoring with a laser level helps avoid over‑lifting, which could stress basement walls.
Written by Fletcher Abernathy
View all posts by: Fletcher Abernathy